

For a long time now, the car has not been the only means of transport for drivers to get comfortably from A to B. While back then it was all about being able to cover a long distance in the shortest possible time, today the vehicle has also become a hobby for one or the other owner. Therefore, it stands to reason that many would like to deal with the exterior and the general appearance of their vehicle. So many car owners opt for professional car washes, or tinting the window panes, or high-quality and visually striking rims are purchased in order to put the appearance of the vehicle more in the limelight. But in recent years, a very special trend has gained more and more attention: painting the brake caliper of a vehicle. Brake calipers in bright colors are particularly striking. For example, dark blue or dark red brake calipers on an otherwise black body. But also green or yellow calipers, or even white or pink – there are no limits to the imagination of a vehicle owner.
Have you also acquired a taste and would like to give your vehicle a completely new individual look? In the following we give you a brief insight into the painting of the brake calipers, as well as the actual process of painting and useful tips.
Contents
Why paint the brake caliper in particular?
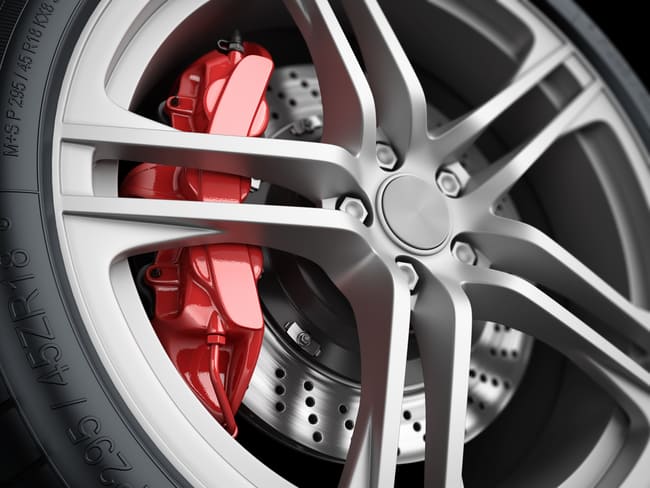
In general, the brake caliper does not really catch the eye at first. It is a component from the second row, which actually does not necessarily attract attention. But when a car enthusiast decides to buy new rims, things look very different: because high-quality rims are usually filigree and have delicate spokes, which in turn allows a completely different insight into the inner workings of the wheel. And now, at the latest, the view of the usually dirty brake caliper is completely clear. Maybe that's exactly what gave the impetus to paint this component, which usually attracts attention because of dirt, in bright colors to make it a new eye-catcher.
How exactly is it done the brake caliper painted?
There is really only one method used to paint the brake caliper: the brush. Foiling makes no sense here, since the high temperatures to which the brake caliper is exposed when driving would simply burn the foil away. So in order to paint the brake caliper optimally and not to accidentally touch the adjacent components as well, you should only use a brush here. If you don't have a particularly steady hand, you should entrust this task to professionals. However, if you dare to do this task, you should immediately get a complete set for painting the brake calipers. These sets usually include brake cleaner, paint (varnish and hardener), brush and mixing cup, as well as disposable gloves. In addition, sandpaper and a wire brush can also be used if the calipers are particularly dirty here. Breathing and eye protection can also be helpful here.
How do I proceed when varnishing?
First of all, you should know one thing: the final result usually depends solely on how well you have prepared the work, i.e. to what extent you have been able to remove dirt and rust from the brake caliper. Because only when the surface of the component is completely free of dirt and rust can the paint adhere properly and leave a perfect result and a bright color. The actual process here involves disassembling, cleaning and taping the parts, although of course the caliper itself is not disassembled. When working, also pay particular attention to the sensors, the rubber sleeves and the guides that are located around the component.
Also, be sure to wear a respirator and gloves when painting. In order to be able to remove the dirt from the component optimally, you will also use chemicals, apart from a lot of physical effort. If you experience even signs of dizziness or find you are otherwise uncomfortable with your work, stop working for the time being. Your health always comes first! To be on the safe side that no adjoining components are also painted, it is advisable to seal all components that are to remain unpainted with masking tape. The brake disc should also be covered. Although there are still voices that claim that covering with masking tape is not necessary, beginners in particular should not do without these aids.
Also pay attention to the mixing ratio
You should always stick to what is stated on the packaging. So don't do any experiments! For example, if too little hardener is used, the paint may take longer to dry than planned. However, if too much of the hardener is used then the paint may dry too quickly.
Also, you should always paint the caliper from top to bottom and not the other way around. And be prepared for the fact that a second coat of paint will have to be applied. There should be at least three to four hours between the first shift and the second shift. Only when the second layer has completely hardened is your job done. And don't forget to reinstall the removed sensors.
The conclusion and a tip from CarTipsandmore
A dark body and brake calipers painted in bright colors: every car enthusiast knows what a visual highlight this can be. Especially in dark vehicles, painting the brake calipers in eye-catching colors can add a particularly sporty character. In this article we have been able to give you tips on what the painting process looks like and what you should pay attention to. A tip from CarTipsandmore, however, is to get help from specialists the first time you try. Let us show you exactly how the painting process is prepared, how the brake caliper can be cleaned of dirt and rust in the best possible way and how the two layers of paint are applied without streaks or runs occurring. Also, use masking tape, because only if the brake discs and surrounding components are perfectly covered will there be no unwanted paint stains on other components afterwards. Only precise and detailed work will bring the result you want.